Setup example
Here is an example to set up using the SimpleAgent model included in Examples.
Installing the AI Navigation Package
AgentController uses the AI Navigation package.
Follow the steps below to install the AI Navigation package.
If it's already installed, this step is not necessary.
- Select “Window > Package Manager” from the menu.
- Select the Unity Registry category from the side panel.
- Select AI Navigation from the list.
- Click the “Install” button in the package details section.
Importing the Examples
Import the examples from the Package Manager.
Note that the examples use the Universal Render Pipeline.
If you do not want to change from another rendering pipeline, we recommend that you recreate the URP project or replace it with another model and continue reading.
- Select “Window > Package Manager” from the menu.
- Select the In Project category from the side panel.
- Select Arbor 3: FSM & BT Graph Editor (the one with the Custom tag) from the list.
- Select the Samples tab in the details section.
- Click the “Import” button.
- Select everything in the Import Unity Package window and click “Import”.
Creating an Agent object
- Click the + button in the Hierarchy window.
- Select “Arbor > Agent Controller” from the menu.
Deployment of SimpleAgent model
- Drag and drop “Assets/Arbor/Examples/Common/Models/SimpleAgent.fbx” to the child of the Agent object and place it.
(Rather than adding the AgentController directly to the GameObject created by arranging the model, it will be easier to replace the model later if it is divided into parent and child objects.)
SimpleAgent object settings
Animator
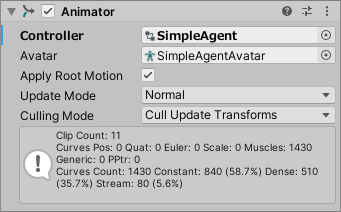
- Select “Assets/Arbor/Examples/Common/Models/SimpleAgent.controller” in the Controller field.
Agent object settings
NavMeshAgent
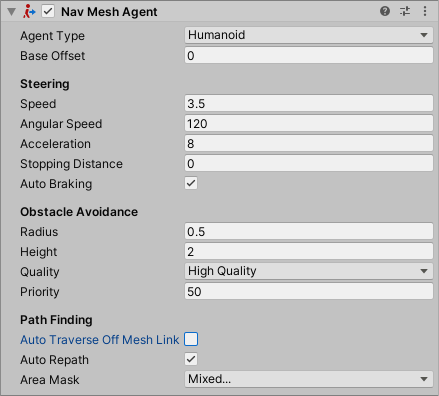
- Uncheck the Auto Traverse Off Mesh Link field.
AgentController
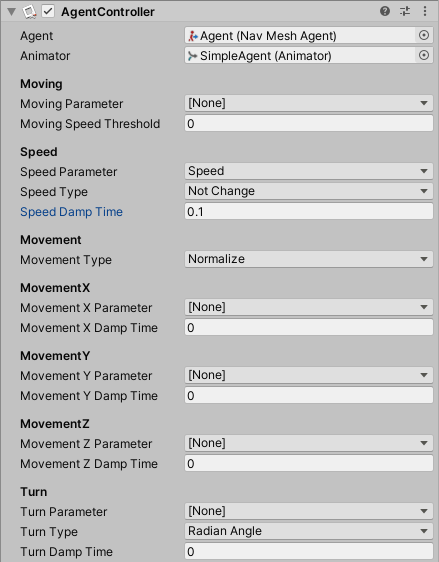
- Select own NavMesh Agent in the Agent field.
- In the Animator field, select the child SimplaAgent object Animator.
- Select the Speed parameter in the Speed Parameter field.
- Set the Speed Damp Time field to 0.1.
Jump Across
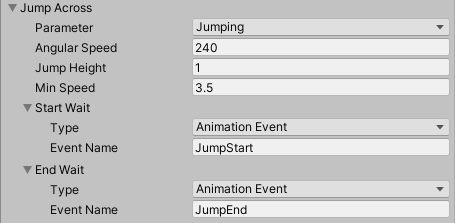
- Select the Jumping parameter in the Parameter field.
- Set 240 in the Angular Speed field.
- Set the Jump Height field to 1.
- Start Wait
- Set Animation Event in the Type field.
- Set JumpStart in the Event Name field.
- End Wait
- Set Animation Event in the Type field.
- Set JumpEnd in the Event Name field.
Drop Down

- Make the same settings as Jump Across.
(If there is a falling motion when practicing, please set it as necessary)
Behavior control
You can move from State Machine or Behaviour Tree by using Agent behavior control. In addition, NavMesh is used to control the movement route, so a navigation mesh is required for the scene. For more information, see Create a NavMesh.