Multilingual editor support
Behavior attributes and editor extensions can support multiple languages.
Preparing language files
In order to support multiple languages, it is necessary to add each language file.
Also, register the folder where the language file is placed.
Since language files can only be used in the editor, place them in the Editor folder.
LanguagePath
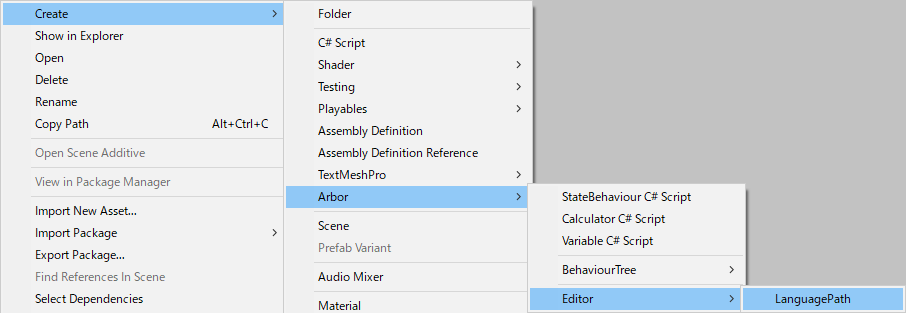
Placing a language file To register a folder, place the LanguagePath asset in a folder.
- Select the folder to place in the Project window and right-click.
- Select “Create / Arbor / Editor / LanguagePath”.
- As there are no particular restrictions on the name, please give me the name you like.

Create language file
If you create a file of “Language name.txt” in the folder where the LanguagePath asset is placed, it will be recognized as a language file.
“Language name” must have the same name as the value of the SystemLanguage enumerator.
Unity ScriptReference : SystemLanguage
Writing a language file
In the language file, write it in the format of “word key: display character string” line by line.
Also, if the line head is “//” it is regarded as a comment and that line is ignored.
For example, create Japanese.txt and fill in as follows.
|
|
Next, create English.txt and fill it in as follows.
|
|
Example of folder structure
- Assets
- Editor
- Languages
- LanguagePath.asset
- English.txt
- Japanese.txt
- Languages
- Editor
Language word reference
Reference from editor extension
To reference from an editor extension, use ArborEditor.Localization.GetWord() or GetTextContent().
Example script of editor extension
TestLocalizationBehaviour.cs
|
|
TestLocalizationBehaviourEditor.cs
|
|
Display example of editor extension
References in behavior attributes
If you set the localization field to true on AddBehaviourMenu or Behavior Title, it will be referenced from the language file.
Example script using attributes
|
|
Display example using attributes
English
Japanese